Thursday, May 29, 2014

Light Chicken Fried Rice


On my work days I want to get dinner made in the shortest amount of time with minimal dishes.  This recipe is perfect for that because it is a one-pot meal that includes protein (chicken), vegetables (peas and carrots), and a grain (rice).  You make the rice in advance because cold rice absorbs the flavors better so you can have dinner on the table in less than 20 minutes.  When I make this I use a big cutting board so I can dice up my carrots, ginger, garlic, and shallot before I start anything else.  Then I just add in each pile as I need it.

This has all of the yummy flavors of chicken fried rice but with brown rice, bigger chunks of chicken, and minimal oil so it is healthier for you.  Years ago I saw a recipe for chicken fried rice with bok choy in cooking light magazine.  I adapted it back then to be more in line with my picky husband's tastes and a little bit more streamlined.  Over the years, I've tweaked it here or there and now it is one of those recipes I keep in the back of my mind and can throw together when I need a quick meal.

During naptime (or even the day before) make 4 servings of brown rice according to the package instructions.  I use Uncle Ben's Fast & Natural instant brown rice.  Then put it in the fridge until you are ready to make dinner.

Cut some boneless, skinless chicken into bite-size chunks.  I use chicken breast tenders.  Toss the chicken with 1 tbls. of soy sauce to coat.  Then set it aside.

Dice up some carrots, put them in a microwave safe bowl with a few tablespoons of water, and microwave covered for about 6 minutes.  You can use frozen carrots instead, but we always have carrots around for snack-time so I just use fresh.

In a skillet large enough to make the whole meal, heat some vegetable oil over medium-high heat.  Then add some chopped shallots, garlic, and fresh ginger.  If you don't have any shallots, I've added extra garlic and some onion powder in a pinch and it was still really good.  You can also use a few generous shakes of powdered ginger if you don't have fresh.  The fresh is better, but sometimes I think I have some in my freezer and it turns out I don't so powdered it is.

Saute this for a few seconds until it starts to be fragrant then add in the chicken.  Saute the chicken for about 4 minutes, flipping it around so that it cooks on all sides.


Then add in your rice, the rest of the soy sauce, and a little sesame oil.  Cook for about 1 minute stirring constantly.


Add in some frozen peas and the carrots you microwaved earlier.  Stir frequently and cook for about 2 minutes.


Push the rice mixture to one side of the pan and crack an egg into the empty side of the pan, quickly scrambling it.  Let the egg cook, stirring constantly, for about 1 minute or until almost set, then stir it in to the rice mixture.


Dinner is ready.  I serve this with extra soy sauce on the side.  If you're lucky and have any leftovers, this is really good reheated for lunch the next day.  We usually devour this though so I almost never get to pack it for lunch.


Light Chicken Fried Rice
Loosely Adapted from Cooking Light

  • 1 lb. boneless, skinless chicken breasts cut into bite-size chunks
  • 3 tbls. low-sodium soy sauce, divided
  • 1 tbls. canola oil
  • 1/2 cup chopped shallots
  • 2 cloves garlic, minced
  • 2 tsp. minced fresh ginger
  • 4 servings cooked, cooled brown rice
  • 1/2 cup frozen peas
  • 2 large carrots, chopped 
  • 1 tsp. sesame oil
  • 1 egg
  1. Toss the chicken with 1 tbls. soy sauce to coat.
  2. Put carrots in a small microwave-safe bowl with a few tbls. of water and microwave, covered, on high for 5 - 6 minutes.
  3. In a large, deep skillet heat the canola oil over medium-high heat.  Then add the shallots, garlic and ginger and saute for about 10 seconds.
  4. Add in chicken and saute for about 4 minutes, stirring occasionally.
  5. Add rice, the rest of the soy sauce, and the sesame oil to the chicken mixture and stir constantly for about 1 minute.
  6. Stir in the frozen peas and the microwaved carrots and continue to cook, stirring occasionally for 2 minutes.
  7. Push the rice mixture to one side of the pan and crack the egg into the empty space, quickly scrambling it.  Cook for about 1 minute, or until almost set, stirring constantly, then mix into rice mixture.
  8. Serve with extra soy sauce on the side if desired. 


I'm linking up with Thrifty Thursday, Pin Junkie, Moonlight & Mason Jars, T.G.I.F.Link Party Palooza, Best of the Weekend, Weekend Potluck, and Strut Your Stuff Saturday, Inspiration Monday, Mix It Up Monday, Craftastic Monday, Monday Funday, Busy Monday, Two Cup Tuesday, Tips & Tricks, Create Link Inspire, Mad Skills, Lou Lou Girls, Made By Me, Whimsy Wednesday, Wake Up Wednesdays, Wednesday Whatsits, Showcase Your Talent Thursday, Pin It Thursday, and Create It Thursday.

Tuesday, May 27, 2014

Lemon Cake


Growing up my mom made pretty much everything from scratch.  The one exception to this was her lemon cake.  It is a doctored up boxed cake and it is so good.  This cake is moist, sweet, lemony, and delicious.  This lemon cake is also incredibly quick and easy.

Start out by combining a box of lemon cake mix with a box of lemon pudding mix.  Add in 4 eggs and some sprite.  Mix it all together and then slowly drizzle in a little bit of vegetable oil.  Give it a final stir, making sure to scrape the bottom of the bowl so that it is all incorporated.

Pour the batter into a bundt pan sprayed with baking spray and bake at 350 for about 30 minutes.


Let it cool in the pan for a bit and then run a knife around the edge to unmold it and let it finish cooling.

Now for the part that takes this Lemon Cake from good to amazing.

Squeeze a lemon into a pan and then add in equal parts sugar and water.  Bring it to a boil and let it cook until it is reduced to a lemony simple syrup.

Take a skewer and poke it 3/4 of the way down into the cake all over.


Drizzle the syrup over the top of the cake and into the holes.


Sweet, lemony, nirvana.  You're welcome.


Lemon Cake
  • 1 box lemon cake mix
  • 3.4 oz. box instant lemon pudding mix
  • 4 eggs
  • 1 cup sprite
  •  1/2 cup vegetable oil 
  • 1 lemon
  • 1/3 cup sugar
  • 1/3 cup water
  1. Spray a bundt pan with baking spray, alternately butter and flour the pan.  Preheat the oven to 350.
  2. Combine cake mix and pudding mix.
  3. Add in eggs and sprite and mix.
  4. Drizzle in oil slowly while continuing to mix.
  5. Pour batter into the prepared pan and bake at 350 for the length of time it says on the box, checking it 5 minutes early.  
  6. Let cake cool in the pan for 10 minutes, then unmold and continue to cool.
  7. Meanwhile, squeeze the lemon into a small saucepan.  Add in sugar and water and bring to a boil, stirring occasionally, until reduced to a syrup.
  8. Use a skewer to poke holes 3/4 of the way down into the cake.  Drizzle syrup over the top and into holes. 

I'm linking up with Wednesday Whatsits, Wake Up Wednesdays, Whimsy Wednesdays, Made By Me, Showcase Your Talent Thursday, Pin It Thursday, Thrifty Thursday, Pin Junkie, Moonlight & Mason Jars, Get Him Fed Fridays, T.G.I.F., Link Party Palooza, Best of the Weekend, Weekend Potluck, and Strut Your Stuff Saturday, Inspiration Monday, Mix It Up Monday, Craftastic Monday, Monday Funday, Busy Monday, Two Cup Tuesday, Tips & Tricks, Create Link Inspire, Mad Skills, and Lou Lou Girls.  

Thursday, May 22, 2014

Arugula, Sun Dried Tomato, & Feta Pasta Salad


Pasta salad is one of my favorite party foods.  When I throw a birthday party, I tend to go all out (check out my Cars and Superman parties here: 1, 2, 3, 4), so I like foods that can be made in advance and don't need to be served hot.  This arugula, sun-dried tomato, and feta pasta salad is one I turn to again and again.  I regularly get asked for the recipe so I thought I would post it on here so that everyone can make it.

What really sets this pasta salad apart is the dressing.  It's based on a salad dressing that my stepmom makes.  The trick is a combination of two vinegars, red wine and rice wine.  A lot of pasta salads use a pre-made dressing but homemade dressings are super easy and make a huge difference.

Start out by cooking your pasta according to the directions on the pasta.  I used penne this time but any short pasta you like is perfect.  While your pasta is cooking make the dressing.  Combine some extra-virgin olive oil with equal parts rice wine and red wine vinegars.  Stir in a little dijon mustard, dried oregano, onion salt, and pepper.

Drain the pasta and then toss with the dressing while it's still warm.  Refrigerate the pasta until it is cool then add in a container of feta with mediterranean herbs and half of a jar of julienned sun-dried tomatoes.  I got my feta and my tomatoes at Trader Joe's.


Toss it all together and refrigerate until ready to serve.  You can make it to this point the day before.


Right before serving, add in about half of a package of arugula and toss it all together.  Then sit back and wait for the compliments to come rolling in.  This is the perfect pasta salad to bring to a barbecue this holiday weekend.


Arugula, Sun-Dried Tomato, & Feta Pasta Salad
  • 1 lb. pasta, penne or other short shape
  • 4 oz. oil-packed julienned sun-dried tomatoes
  • 6 oz. package crumbled feta with mediterranean herbs
  • 3 1/2 oz. arugula
For Dressing:
  • 3 oz. extra-virgin olive oil
  • 3 tbls. red wine vinegar
  • 3 tbls. rice wine vinegar
  • 1 tsp. dried oregano
  • 1 tsp. dijon mustard
  • 1/4 tsp. onion salt
  • 1/4 tsp. pepper
  1. Cook pasta according to package instructions.
  2. While pasta cooks whisk together all dressing ingredients.  Drain pasta and toss with dressing while still warm.  Cover and refrigerate until cool.
  3. Stir in sun-dried tomatoes and feta and refrigerate until ready to serve.
  4. Right before serving, add arugula and toss well.

I'm linking up with Wednesday Whatsits, Wake Up Wednesdays, Whimsy Wednesdays, Made By Me, Showcase Your Talent Thursday, Pin It Thursday, Thrifty Thursday, Pin Junkie, Moonlight & Mason Jars, T.G.I.F., Link Party Palooza, Best of the Weekend, Weekend Potluck, Strut Your Stuff Saturday, Inspiration Monday, Mix It Up Monday, Craftastic Monday, Monday Funday, Busy Monday, Two Cup Tuesday, Tips & Tricks, Create Link Inspire, Mad Skills, and Lou Lou Girls.  

Tuesday, May 20, 2014

Cheap & Easy Lego Storage


I recently shared how we transformed Jake's room into a baseball loving boy's dream.  He loves his room and so do we, but in the past 6 months, we've run into a small problem.  Jake has been bitten by the Lego bug.  For the holidays and his birthday Jake got A LOT of Lego sets and he is in heaven.  Unfortunately his current toy storage wasn't cut out for tiny Lego pieces so we needed to figure something out.  Since Lucas will be mobile before we know it, we also needed a solution that would allow Jake to have a place to play with his Lego bricks and mini-figures that wasn't a danger to his brother.

I saw this great idea on Pinterest.  It is perfect because the bigger drawers house his bigger Lego sets and completed creations and the smaller drawers hold the extra pieces and small sets.  The board on top gives him a place to both build Lego creations and do his homework without worrying about his little brother getting into his stuff.

It was so easy to make!  We just bought 3 of those plastic drawers on wheels from Target (on sale of course).   We went to Home Depot and bought a board that was the right size to fit on top.  Then Josh painted it to match Jake's walls and once it dried laid it on top of the plastic drawers.  That's it!  He can wheel out the center drawers and set this little stool in there so he can sit at it like a desk.


This was the perfect solution.  To make the organization complete, a friend of mine gave me a great idea to corral all of the instruction booklets from his Lego sets.   I gave him a 3 ring binder filled with plastic sheet protectors.  He just puts the instruction booklets into the sheet protectors.  This way they are all in one place neatly stored on his bookshelf and he can flip through the pages to quickly find the instructions he is looking for.

There you have it, a cheap and easy solution for Lego storage and organization.


I'm liking up with Moonlight & Mason Jars, Wonderfully Creative Wednesday, Made By Me, Whimsy Wednesday, Wednesday Whatsits, and Wake Up Wednesdays, Pin It Thursday, Thrifty Thursday, Create It Thursday, Pin Junkie, T.G.I.F., Link Party Palooza, Best of the Weekend, Weekend Potluck, Strut Your Stuff Saturday, Inspiration Monday, Mix It Up Monday, Craftastic Monday, Monday Funday, Busy Monday, Two Cup Tuesday, Tips & Tricks, Create Link Inspire, Mad Skills, and Lou Lou Girls.  

Thursday, May 15, 2014

Cilantro Lime Chicken


With the approach of spring we have been using our grill a lot.  I recently bought a few limes for a pork recipe but we ended up doing something else with it instead.  I didn't want them to go to waste and then I remembered this chicken recipe that I used to make by doctoring up some Lawry's marinade.  I played around with it and made it using all fresh ingredients.   The result was super juicy chicken with a fresh and vibrant flavor.  

To make the marinade zest and juice 3 limes.  Add in olive oil, minced garlic, and some salt & pepper.  Then roughly chop up some cilantro and stir it in.


Put your chicken (I used breast tenders) in a large ziploc and pour the marinade on top.  Seal the bag and then massage the marinade into the chicken.  Refrigerate the chicken in the marinade for at least 30 minutes.  I prepped mine during Lucas's afternoon nap so it marinated for about 3 1/2 hours.

When you are ready for dinner, grill the chicken over medium heat for 4-5 minutes per side.  This chicken is really versatile.  It is great with just brown rice and veggies.  Or you can saute some red bell peppers and onions and eat it like fajitas. 


Cilantro Lime Chicken
  • 1 lb. boneless, skinless chicken breast tenders
  • zest and juice of 3 limes (about 1/4 cup lime juice)
  • 1/3 cup olive oil
  • 1/2 tsp. salt
  • 1 tsp. pepper
  • 3 cloves garlic, minced
  • 1/4 cup cilantro, roughly chopped
  1. Combine all ingredients except chicken.  
  2. Put chicken in a large ziploc bag and pour marinade on top.
  3. Massage marinade into the chicken and refrigerate for at least 30 minutes.
  4. Remove from marinade and grill over medium heat until cooked through, about 8-10 minutes flipping once halfway through.

I'm linking up with Thrifty Thursday, Pin Junkie, Create It Thursday, Get Him Fed Friday, Link Party Palooza, Best of the Weekend, Strut Your Stuff Saturday, Show Stopper Saturday, Inspiration Monday, Craftastic Monday, Busy Monday, Mix It Up Monday, Monday Funday, Two Cup Tuesday, Lou Lou Girls, Tips & Tricks, Mad Skills, Create Link Inspire, Moonlight & Mason Jars, Wonderfully Creative Wednesday, Made By Me, Whimsy Wednesday, Wednesday Whatsits, Wake Up Wednesdays, and Pin It Thursday.

Tuesday, May 13, 2014

What I Wore - Fall Colors in Spring


The weather has been crazy lately.  One week it's in the 90s, then next it's in the 60s.  I know lots of people are looking forward to sandals and sundresses, but I barely got a chance to wear my sweaters and boots this year so I was super excited when the weather cooled down. 

This outfit has more of a fall color palette, but I love these jeans and really missed being able to wear them so when the weather cooled off and these jeans zipped up I couldn't resist.


Everything I am wearing is old but they are all pieces that I love.  I have a hard time finding sweaters because I'm allergic to wool so I was really excited when I found this one.  It is a cotton silk blend and is soooo soft.

All this outfit is missing is the perfect bag.  I'm on the hunt for a big tote to use as a mommy bag in a similar color to these boots.  Does anyone have one that they love?


I'm linking up with Get Your Pretty On, Pleated Poppy, Because Shanna Said So, Three-fer Thursday, and Style Elixer.

Thursday, May 8, 2014

Overnight Caramel French Toast


I love breakfast foods!  Pancakes, hashbrowns, eggs, waffles, coffee cake, I love it all.  We recently had some friends over for breakfast and I wanted to make something decadent and delicious.  Since I have a baby, I don't always have a lot of hands-on time to cook in the morning.  Enter the overnight breakfast casserole.  Overnight breakfast casseroles are a busy mom's dream come true.  I have made lots of different versions, some savory, some sweet, but this is one of my favorites!  When Josh got home from work, Jake rushed over and yelled "Dad, Mom made CHALLAH french toast with CARAMEL!!!!"  He was pretty excited and you will be too once you take a bite of this Overnight Caramel French Toast.

It comes together really quickly and then overnight the challah absorbs the delicious custard.  It bakes up all golden and when you have that thick caramel sauce oozing over the top you will be in breakfast heaven.  This would make a perfect Mother's Day breakfast!

Start out by melting a stick of unsalted butter with a cup of brown sugar and a little light corn syrup (it's not just for pecan pie).   


While that is melting, tear or cut up your challah into bite sized chunks removing most of the crust.  Pour the caramel into the bottom of a 13 x 9 baking dish sprayed with cooking spray.


Take the challah chunks and put them all over the caramel in a single layer.


In a big measuring cup combine some half-and-half, eggs, vanilla paste (you can use vanilla extract if you don't have any), a little Grand Marnier, some salt, and some pumpkin pie spice.  If you don't have any pumpkin pie spice, cinnamon would be delicious too but I love the way that the citrus flavors in the pumpkin pie spice complement the Grand Marnier.


Pour the egg mixture over the bread and use a spoon to press any chunks that are sticking up into the custard.  Cover it with plastic wrap and stick it in the fridge overnight.


In the morning, pull it out of the fridge about 45 minutes before you are going to bake it.  Then bake it at 350, uncovered, for about 40 minutes.  It will be puffed up and golden.  Be careful not to overcook it or the caramel will start to harden.

Invert it when you serve it so that the gooey caramel is on top.  It may not be the prettiest dish, but it is oh so good.  The warm caramel sauce, combined with the sweet custardy challah makes a perfectly decadent breakfast treat!  I recommend serving it with some crispy bacon and fruit. 


Overnight Caramel French Toast
Adapted from Epicurious
Serves 4-6 
  • 1/2 cup unsalted butter
  • 1 cup packed brown sugar
  • 2 tbls. light corn syrup
  • loaf of challah
  • 1 1/2 cups half and half
  • 5 eggs
  • 1 1/2 tsp. vanilla paste
  • 1 1/2 tsp. Grand Marnier
  • 1 tsp. pumpkin pie spice
  • 1/4 tsp. salt
  1. In a small saucepan melt butter, brown sugar, and corn syrup over medium heat, stirring occasionally until smooth.  Then pour into a 13 x 9 inch baking pan sprayed with cooking spray.
  2. While the butter mixture melts, cut or tear the challah into about 1-inch chunks, removing most of the crust.  Place the challah chunks on top of the caramel sauce in a single layer.
  3. In a large measuring cup, combine the half-and-half, eggs, vanilla paste, Grand Marnier, pumpkin pie spice, and salt.  Pour over the bread and use a spoon to press any chunks that are sticking up down a little.
  4. Cover and refrigerate overnight.
  5. About 45 minutes before baking, remove the french toast from the fridge so it can come to room temperature.
  6. Bake uncovered at 350 for about 40 minutes, until puffed and golden.  It will deflate after it comes out. 
  7. Serve hot.  When serving, invert on plates so caramel layer is on top. 

I'm linking up with Busy Monday, Inspiration Monday, Craftastic Monday, Monday Funday, Lou Lou Girls, Mad Skills, Create Link Inspire, Two Cup Tuesday, Tips & Tricks, Made By Me, Whimsy Wednesday, Wednesday Whatsits, Wake Up Wednesdays, Moonlight & Mason Jars, Pin Junkie, Thrifty Thursday, Link Party Palooza, Lou Lou Girls, Get Him Fed Fridays, Best of the Weekend, Strut Your Stuff Saturday, The Yuck Stops Here, Show Stopper Saturday, and Weekend Potluck.

Tuesday, May 6, 2014

Losing the Baby Weight - Why I Love Lindsay Brin part 2


It's no secret that I love Lindsay Brin.  During my pregnancy I used her DVDs to stay in shape and manage my weight gain and I ended up gaining 20 pounds less than I did during my pregnancy with Jake (to be fair I didn't exercise at all that time).  After giving birth I was eager to get back on the exercise wagon and as soon as I was able, I turned back to my BFF, Lindsay Brin and Moms Into Fitness.  I started out with her postnatal boot camp which I love.  It starts out with 20 minute workouts which are perfect for a busy new mama.

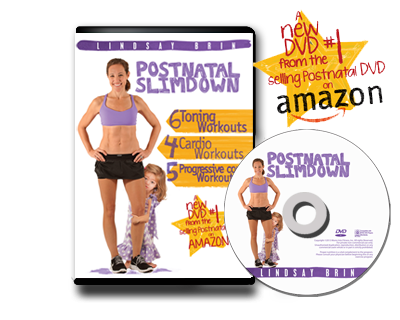
After a few weeks of using Postnatal Boot Camp I found out some AMAZING news.  Moms Into Fitness was releasing a brand new postnatal exercise called Postnatal Slimdown.  At the same time Moms Into Fitness was launching its newly updated and FREE app.  I contacted Moms Into Fitness and asked if they would be willing to hook me up in return for a review on my blog and to my delight they agreed.  They gave me a free digital download of Postnatal Slimdown.


Even though they gave me this workout program, all opinions are my own.  Based on my past experiences with Moms Into Fitness I was certain that this would be a positive review and I was right.  First of all let's talk about my results.  I started out like this (Full disclosure I had been using Postnatal Boot Camp for 6 weeks at this point):


Clearly these are not the most flattering photos but I wanted to be honest with you all.  This is where I ended up:


That's right, NINE pounds in eleven weeks.  These photos were taken exactly 21 weeks after Lucas was born and I'm super excited at how quickly I bounced back.  It took me A LOT longer after Jake.  I should also mention that this is without dieting.  I am not a fan of the diet.  I try to make healthy choices and eat appropriate portions but if you follow this blog then you know that I have a major sweet tooth and I don't tend to deny it.

I know that lots of people say nursing makes the weight fall off.  I know some people find nursing to be very helpful but all I can say is that when I was nursing Jake I couldn't lose the last 10 pounds until I stopped nursing and here I am a few days shy of 5 months postpartum and I've lost it all.

That being said, there are still a few areas I want to lean out before my little sister's wedding this summer so I'm turning once more to Moms Into Fitness with the Pretty Fierce: Lean Out program.


No matter what stage of life you are in, I'm confident that Moms Into Fitness has a program that is right for you.  I recommend signing up for the email alerts from babysteals.com.  I bought several of my DVDs (including Lean Out) on there at a huge discount and they come back around often.


Thursday, May 1, 2014

Peanut Butter Caramel Swirl Brownies


Since I made my Peanut Butter, Chocolate Chip, & Peanut Butter Caramel Cookie Bars I haven't been able to stop thinking about that peanut butter caramel.  It was just so incredibly good.  The combination of peanut butter and caramel, two of my favorite flavors, into one unbelievably delicious flavor was begging to be used again.  I really loved my Salted Caramel Brownies so I thought that Peanut Butter Caramel Brownies would be even better.  I was not wrong!  These are sinfully rich.  The fudgy chocolate combined with the sweet and salty peanut butter caramel creates a dessert nirvana.  You are going to want a tall glass of milk with these.

These Peanut Butter Caramel Swirl Brownies are not only delicious, they are also super easy to make.  Start out with a box of your favorite brownie mix.  I used my old standby, Ghiradelli Triple Chocolate brownie mix.  Mix it up according to the directions on the package.


I think more chocolate is always better so I got some dark chocolate and chopped it up into chunks.


Stir those in and then pour your brownie batter into a baking dish sprayed with cooking spray.


Now for the fun part.  Get some peanut butter and melt it partway in the microwave.  Then add some salted caramel, I used Trader Joe's fleur de sel caramel sauce, and put it back into the microwave until it is nice and melty.


Give it a good stir and then drizzle it over the top of your brownies.


Then grab a knife and drag it through the peanut butter caramel and the brownie batter until it is nice and swirly.


That's it.  Pop it in the oven and then eat a salad because you will want to save your calories for devouring these brownies.  Let them cool before you cut into them.  These are gooey with all of the extra chocolate, peanut butter, and caramel so if you cut them too soon they won't stay together.


Pure.  Dessert.  Heaven.  YUM!!!!

One more exciting thing about these, they freeze well.  So... I recommend making a double batch and baking one in a foil pan.  Once it cools, cover it wtih plastic wrap then stick it in a ziploc and freeze it.  Now when you need an impressive dessert and don't have time to make one, you can just pull them out of the freezer and let them defrost.

Peanut Butter Caramel Swirl Brownies
  • 1 package Ghiradelli Triple Chocolate Brownie Mix
  • 1/3 cup oil
  • 1/3 cup water
  • 1 egg
  • 1/2 cup dark chocolate chunks
  • 1/3 cup peanut butter
  • 1/3 cup salted caramel
  1. Preheat oven to 325.
  2. Make the brownie batter according to the instructions on the package.
  3. Stir in chocolate chunks.
  4. Pour into an 8 x 8 baking pan sprayed with cooking spray.
  5. Microwave peanut butter for 20-30 seconds.  Add in salted caramel and microwave another 20-30 seconds.  Stir until combined.
  6. Drizzle peanut butter caramel on top of brownie batter.  Drag a knife through it until the peanut butter caramel is swirled.
  7. Bake 45-50 minutes.  Let cool completely before cutting.

I'm linking up with Mad Skills, Two Cup Tuesday, Tasty Tuesdays, Tips & Tricks, Create Link Inspire, Made By Me, Whimsy Wednesdays, Wake Up Wednesdays, Pin It Thursday, Showcase Your Talent Thursday, Create It Thursday, Thrifty Thursday, Pin Junkie, The Yuck Stops Here, Get Him Fed Friday, Link Party Palooza, Show Stopper Saturday, Best of the Weekend, Weekend Potluck, Craftastic Monday, Busy Monday, Mix It Up Monday, Monday Funday, and Inspiration Monday.